Edit your website
Change the words, photos, colors and sections on your website, preview it, and publish.
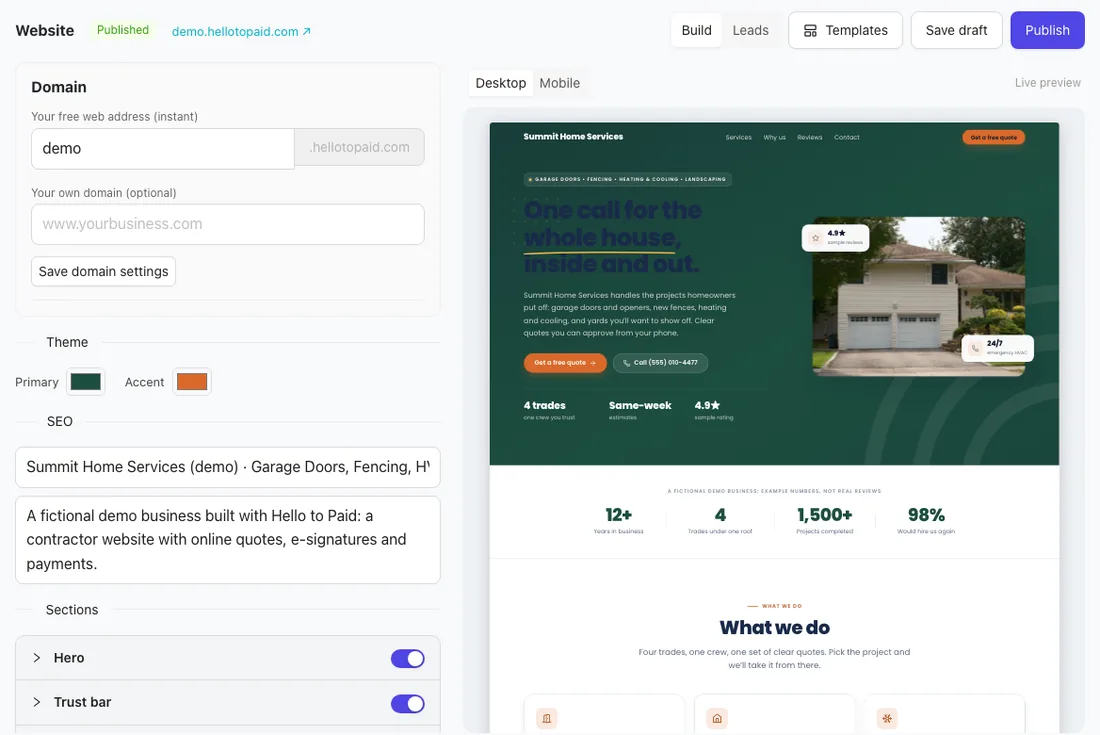
Your website is built from sections: a hero at the top, services, why us, reviews, a contact form and more. You edit each one in a form and see the change in the live preview beside it. Nothing goes live until you click Publish.
Open the editor
Click Website in the menu. You need a role with Business settings to edit it.
The top bar shows whether the site is Published or a Draft, and links to your live site address. Build is the editor; Leads lists messages from your contact form (see Get leads from your website). The Domain box at the top of the editor sets your free web address (any plan) and your own domain. See Use your own domain.
Change the words and photos
- Under Sections, click a section to open it: Hero, Trust bar, Services, Why us (feature rows), Impact band, Testimonials, CTA band, Contact or Footer.
- Edit the text fields. In the hero headline, wrap a phrase in
[[double brackets]]to highlight it. - For a photo, click Upload a photo, or Find a photo to search free stock photos. Replace photo and Remove change it later. Add alt text (what the photo shows); it helps search engines.
- In lists (services, reviews, stats), use + Add, the arrows to reorder, and Remove.
To hide a section, turn off the switch next to its name. It shows Hidden and won't appear on your site.
Change what a button does
The hero's Primary button and Secondary button, and the CTA band's Button, each have a label and an action:
- Scroll to contact form: jumps to the form on your site.
- Section on this page: jumps to a section (type its id, like
services). - Phone (tel:) or Email (mailto:): calls or emails you. Type the number or address.
- External URL: opens any web address you type.
Change the colors
Under Theme, pick a Primary and an Accent color. A new site starts with your brand colors from Settings → Branding; after that the site keeps its own colors. To match your brand colors again, click Use brand colors (it appears when they differ), then Publish. Your logo and company name always come from Settings → Branding. See Add your business details.
Search engines
Under SEO, set the Page title and Meta description. This is what Google shows for your site.
Preview and publish
- Check the preview on the right. It shows your changes as you type, before you save. Switch between Desktop and Mobile.
- Click Save draft to keep your changes without going live.
- Click Publish to put the site live. It saves your draft first.
Unsaved changes shows in the top bar until you save or publish.
If your site doesn't show up, see My website isn't showing.
A website we built for you
If NetAdvisors built and looks after a custom website for you, the Website page says Custom website and links to it instead of showing the editor. Email us what you'd like changed. Leads from its forms still arrive in Hello to Paid as usual.