Custom fields
Add your own fields to customers, properties and jobs, like a gate code, lot size, equipment model or how they found you.
Included on the Pro plan and up. Compare plans
Custom fields let you keep the details your trade cares about on every record. You set them up once, and they show on the customer, property or job form for your whole team.
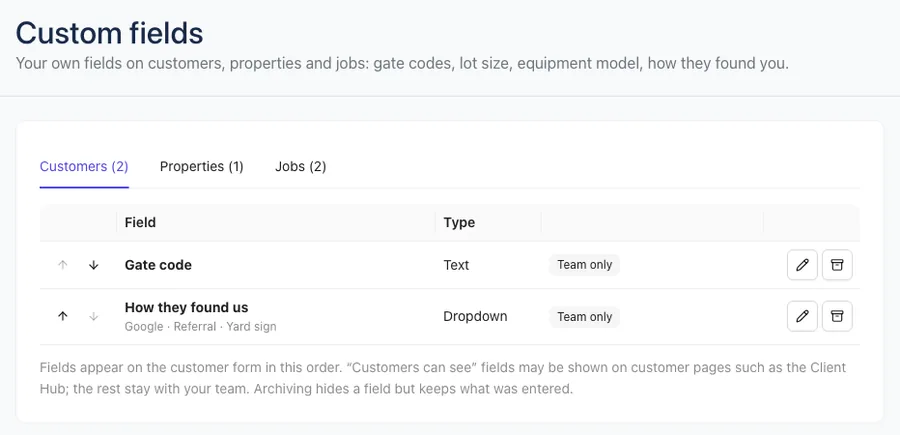
Add a field
- Open Settings → Custom fields. You need a role with Business settings (Owners have it).
- Pick the tab for where the field goes: Customers, Properties or Jobs.
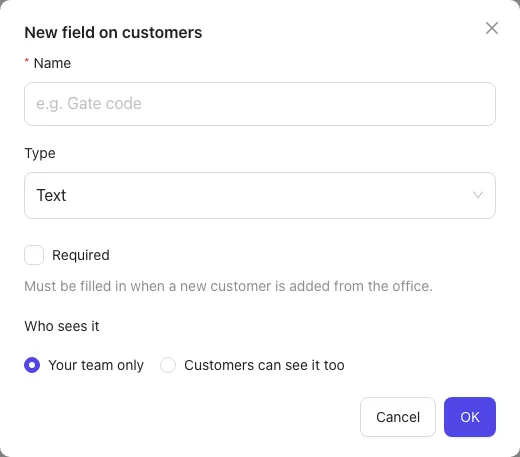
- Click Add field.
- Enter a Name, like "Gate code".
- Pick the Type: Text, Number, Date, Dropdown or Checkbox (yes / no). For a dropdown, type each choice and press Enter.
- Tick Required if it must be filled in when someone adds a new customer, property or job from the office.
- Under Who sees it, leave Your team only, or pick Customers can see it too.
- Click OK.
Where the fields show up
- Customers: on the New customer and Edit forms, and in a Details card on the customer page.
- Properties: on the property form on the customer page, and under each property's address.
- Jobs: in the job's Details card, where anyone who can edit jobs fills them in.
A job field set to Customers can see it too shows under that job's visits on the customer's Client Hub, for example "Permit number". Other fields stay with your team.
Change, reorder or archive
- Click the pencil to rename a field, change its dropdown choices, or change Required and Who sees it. The type can't be changed; archive the field and add a new one instead.
- Use the up and down arrows to change the order the fields appear in.
- Click the archive icon to hide a field from forms. What's already been entered is kept. Turn on Show archived and click Restore to bring it back.