Manage your customers
Add and edit customers, tag them, keep private notes and extra addresses, and see everything you've done for them in one place.
Every quote, job, invoice and request is tied to a customer, so their page becomes a full history of your work together.
Add a customer
- Go to Work → Customers.
- Click New customer.
- Enter the Name (required), Email, Phone and Address. Pick an address suggestion as you type to fill in the city, state and zip.
- Fill in any of your own fields, if you've set some up. See Custom fields.
- Click OK.
You can also add a customer right from the quote editor with New customer, and customers are created for you when you turn a request into a quote. In the app, tap Customers, then +.
Find a customer
- Search by name, email, phone or tag.
- Use the filters: All, Leads (no jobs or payments yet) and Owe money. Leads also show a Lead tag.
- The list shows what each customer Owes and their Lifetime paid.
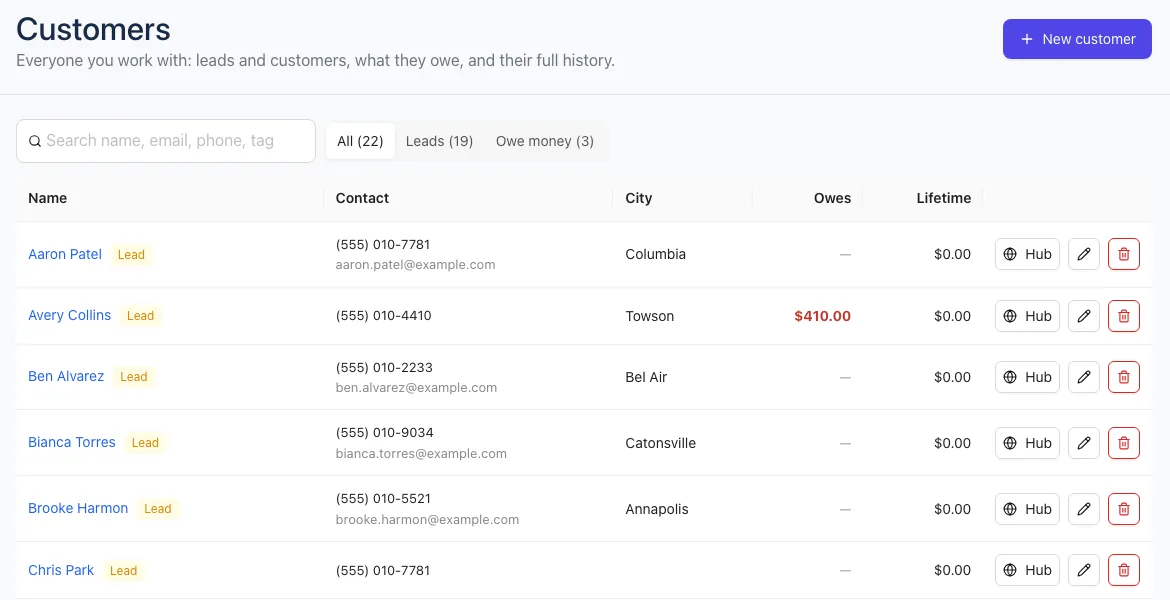
The customer page
Click a name to open it.
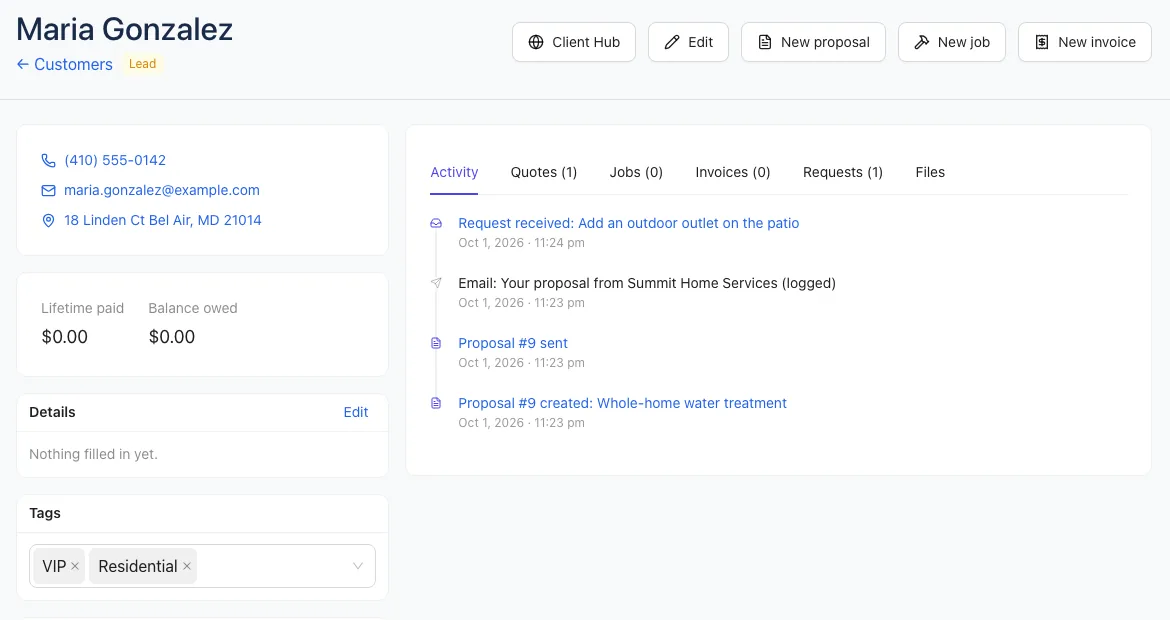
You'll see:
- Contact details: tap the phone, email or address to call, write or get directions.
- Lifetime paid and Balance owed (for people who can see money), plus their next visit.
- Details: your own custom fields, if you've set some up. Click Edit to fill them in.
- Tags: type your own or pick one like VIP, Commercial or Residential. Tags save as you add them.
- Internal notes: gate codes, pets, who to talk to. Only your team sees these. They save when you click away.
- Service plans: on plans with recurring billing, their repeating plans and any saved card or bank account. Click New to start one. See Recurring billing and autopay.
- Properties: their service addresses, like a rental or a second home. Their main address is listed as Main.
From the top of the page you can open their Client Hub, Edit them, or start a New proposal, New job or New invoice already linked to this customer.
History tabs
- Activity: a timeline of everything: requests, quotes sent and signed, jobs, visits, invoices, payments and emails.
- Quotes, Jobs, Invoices and Requests: each list shows status and totals. Click a row to open it.
- Files: on plans with the files library, every photo and document for this customer. See Files and media library.
Add a property
- On the customer page, click Add in the Properties card.
- Give it a Label (like "Lake house"), a Street address and any access Notes, plus any property custom fields.
- Click OK.
Edit or delete
- Click Edit on the customer page (or the pencil in the list) to change details, add a Company, or fill in custom fields.
- Click the pencil on a property to change it, or the trash can to remove it.
- To delete, click the trash can in the list and confirm. Their quotes, jobs and invoices stay, but are no longer linked to anyone.
On your phone
In the app, Customers shows the same list and filters. Open a customer to Call, Text, Email or get Directions, start a New quote, and switch between Work and History. Tap Edit to update their details.