Log expenses and receipts
Record materials, fuel and other costs with a receipt photo, and tie them to a job.
Included on the Pro plan and up. Compare plans
Log what you spend as you go: materials, fuel, equipment, subcontractors, permits. Snap the receipt so you have it at tax time, and tie the cost to a job to see what the job really made.
Add an expense on the web
- Open Work → Expenses.
- Click Add expense.
- Enter the Amount and Date, and pick a Category: Materials, Fuel, Equipment, Subcontractor, Permits or Other.
- Fill in Where (the store or supplier) and What for.
- Pick a Job if it's for one. Leave it as Not tied to a job otherwise.
- Under Receipt, click Add a photo to attach a picture of the receipt.
- Click Save.
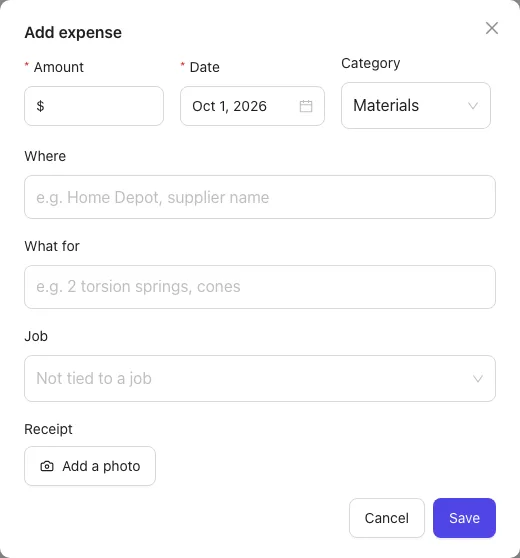
You can also click Expense on a job's Job costing card; the expense is tied to that job for you.
Add an expense in the app
- Tap More → Expenses, then +.
- Enter the amount, vendor, category, date and job.
- Tap Add receipt photo, then Take photo or Choose from library.
- Tap Save.
See your expenses
On the web, the page starts on this month. Pick another date range to see its Total and a total for each category.
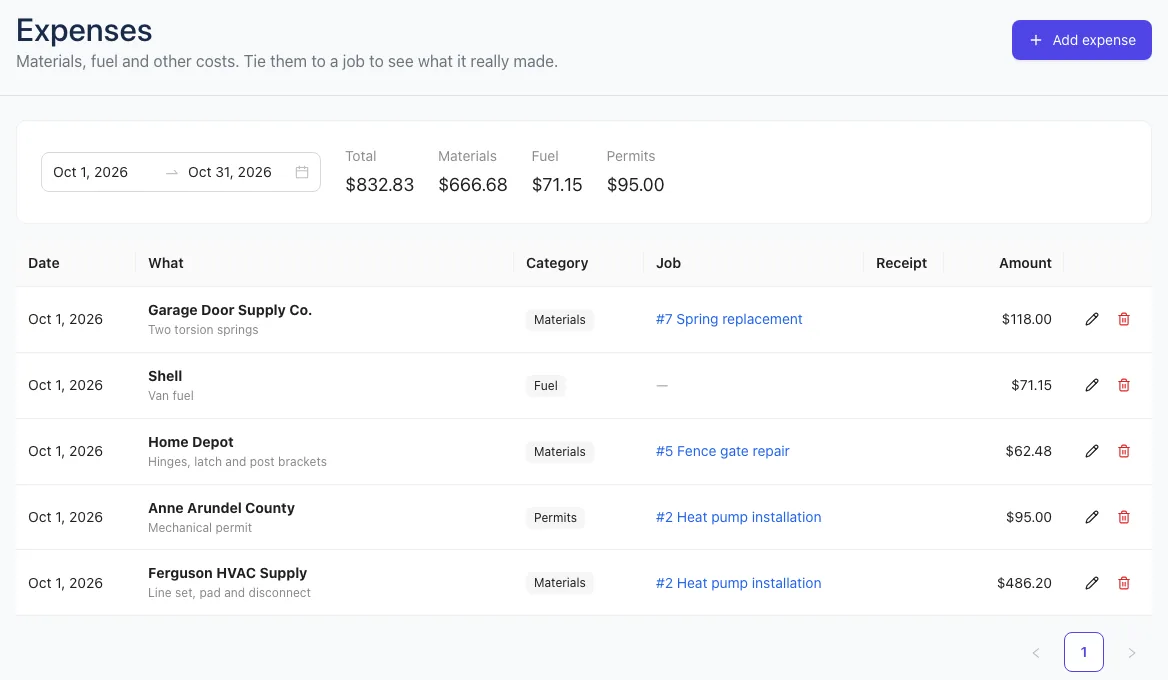
- Click a job in the list to open it.
- The paperclip opens the receipt.
- Click the pencil to edit an expense, or the trash icon to delete it.
In the app, the list shows the last 30 days. Tap an expense to see its receipt.
Who sees what
Everyone can log expenses. Crew see only their own. Owners and office staff see the whole team's. See Roles and permissions.
Tip: On the Growth plan, expenses tied to a job count against its profit. See See what a job made. Receipts also show in the Files library.